
We witness recruiters and talent developers working with tech professionals without really understanding what it means to actually work as a ‘good’ developer. Is it years of experience? The languages they know? How many shortcut keys they use? How fast can they type?
All of these achievements are impressive, but in the end, they don’t amount to much without the right mindset. So much of the programmer’s work is not about the coding itself, but more about being a problem solver, a life long learner, fearless in trying new things, curious to find better and better solutions, and resilient enough to get through the impending challenges because they only get bigger and bigger as their career progresses.
But rather than trying to describe the mindset it takes to be a ‘good’ developer, we prefer to have you feel it first hand. Just like in our bootcamps, you are going to learn by doing. You’re going to build a custom Applicant Tracking System (ATS) for your recruitment pipeline without a line of code. All you need to understand is how to work with API’s.
It would be useful to take an hour and watch Le Wagon’s video workshop on API’s for Beginners before getting started. There you can watch our CTO, Sebastien Saunier, not only explain in the simplest terms what’s an API, but also see a live demo on how to integrate Zapier, Trello and Woofoo.
Build your custom Application Tracking System (ATS)
So, let’s get started?! I’m going to explain how you can start building your custom ATS dashboard without a line of code. Zapier is the secret sauce here. It lets you connect different app platforms together, automating and expediting your workflow.
We will give the foundation for your ATS dashboard and from there, it’s up to you to get curious, keep learning and find other tools and methods of automating your recruitment pipeline.
Tools needed:
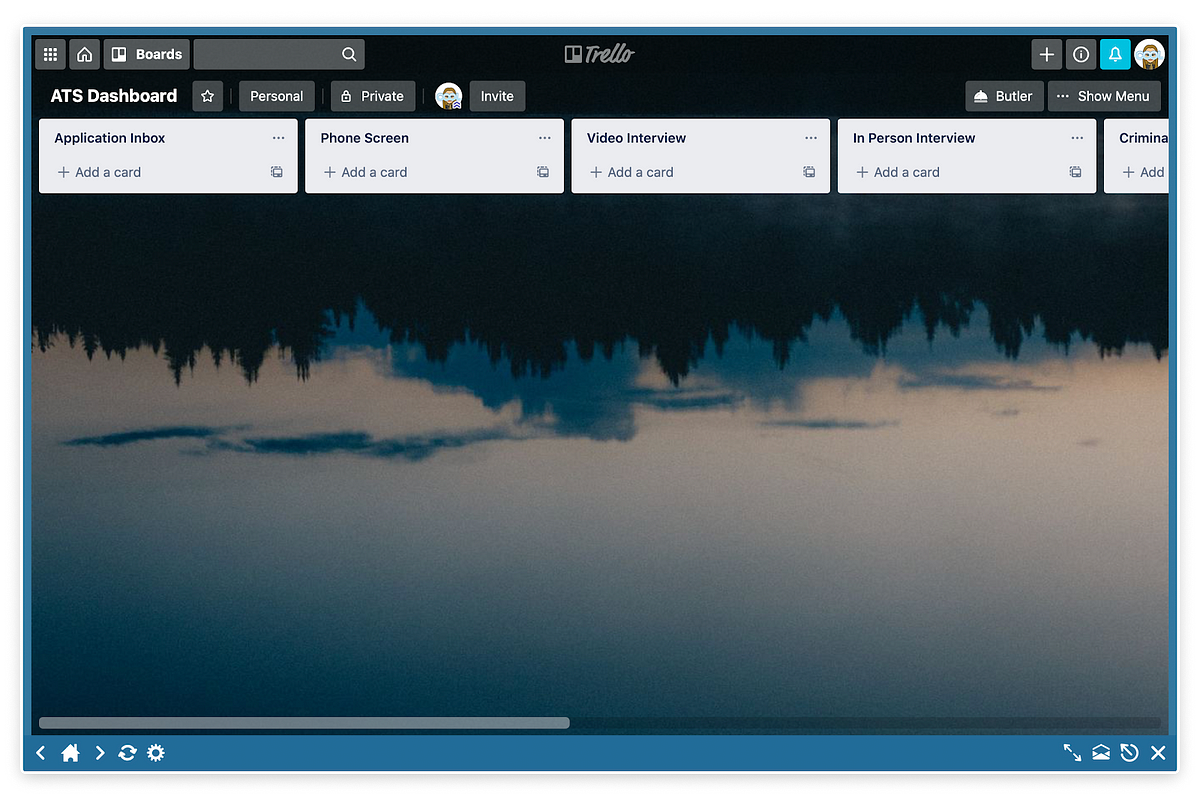
This will be your ATS dashboard, allowing you to intuitively manage your leads through the recruitment pipeline.
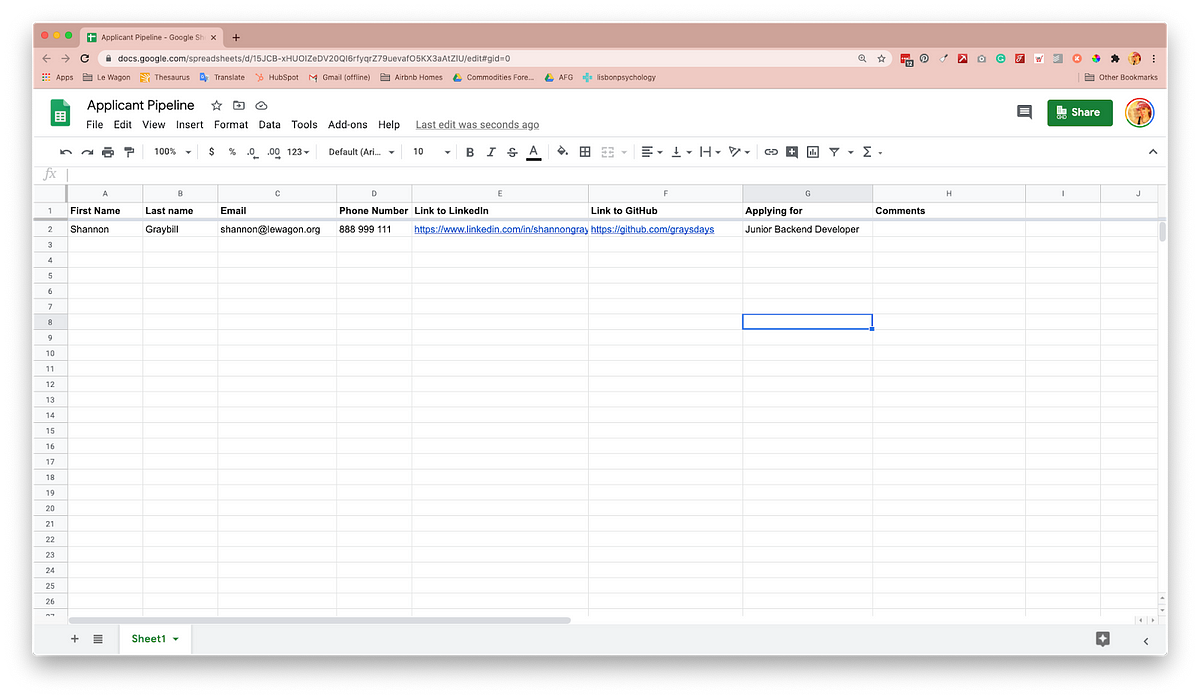
This is where you or your virtual assistant, will enter new applicants.
Zapier will automatically send new leads from your Google Sheet to Trello.
I’m going to guide you through this setup process, step, by step…
Step 1)
Create a Google Sheet for lead entry and include at least one example lead for Zapier to test. After the integration is set up, Zapier will send info over to your Trello ATS Dashboard so you can get to work.
Step 2)
Setup your Trello Board and add boards that will serve to manage your recruitment pipeline.
I labelled the boards: Application Inbox, Phone Screen, Video Interview, In-Person Interview, Criminal Report, Offer Made, Onboarding, NO GO.
Step 3)
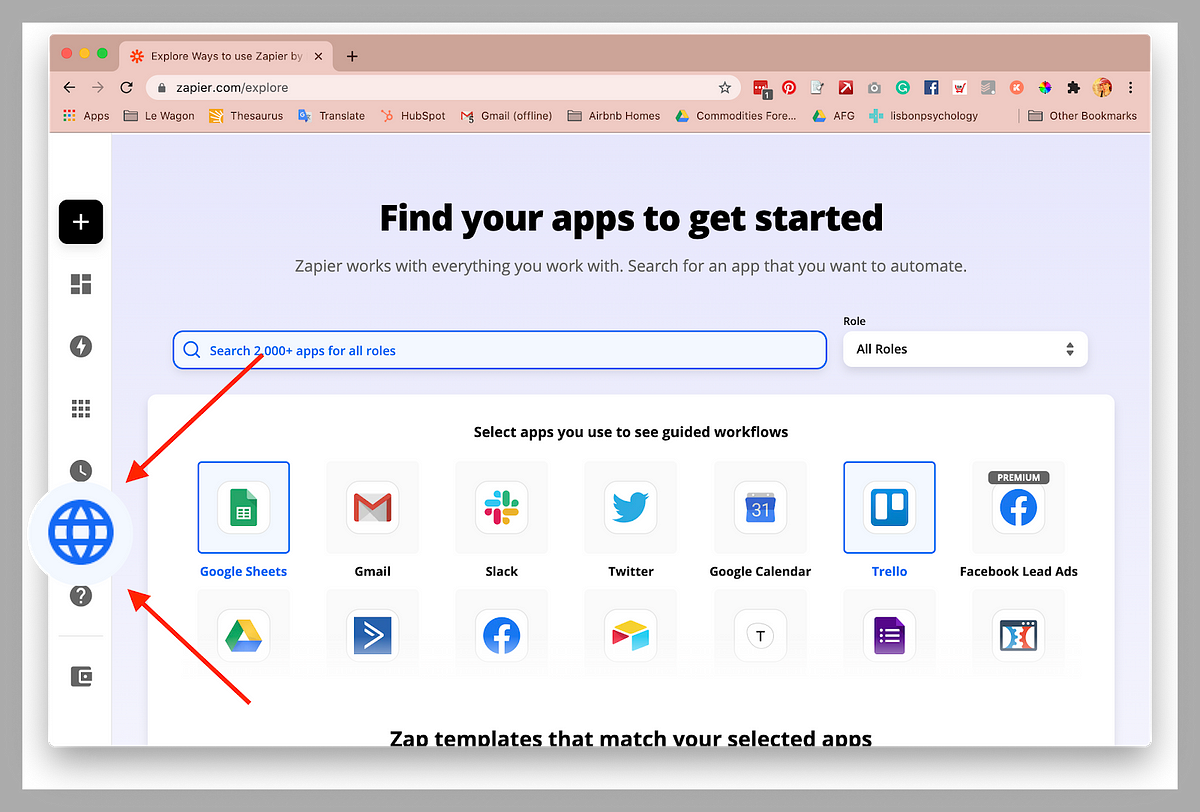
In Zapier, click the “Explore” icon on the left-hand side of the screen, scroll down to the section titled “Find your apps to get started” and select “Trello” and “Google Sheets”.

Step 4)
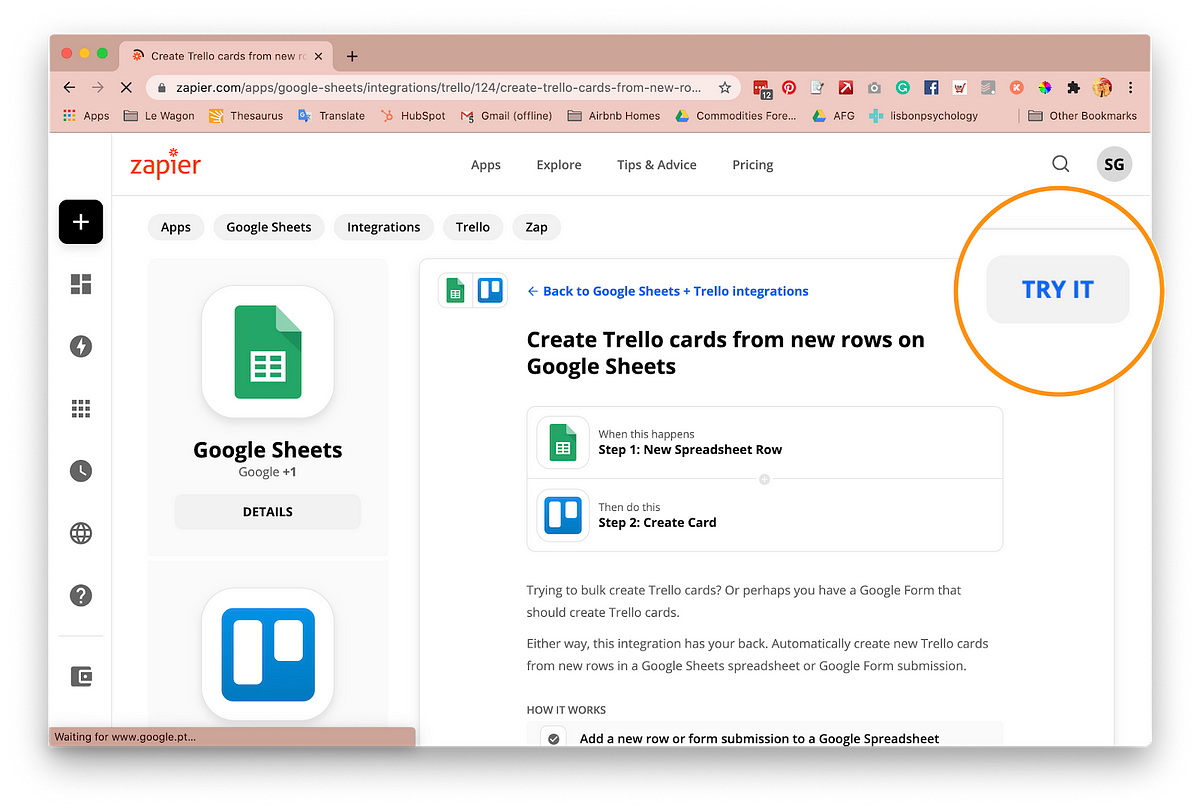
Scroll down to the next section titled “Zap templates that match your selected apps” and select “Create Trello cards from new rows on Google Sheets”…if you select the following “Create Trello cards from new Google Sheets rows” Zapier will create a new card every time you change a field in google sheets. You don’t want this…select the one on the left.
Step 5)
Click “Try it”.
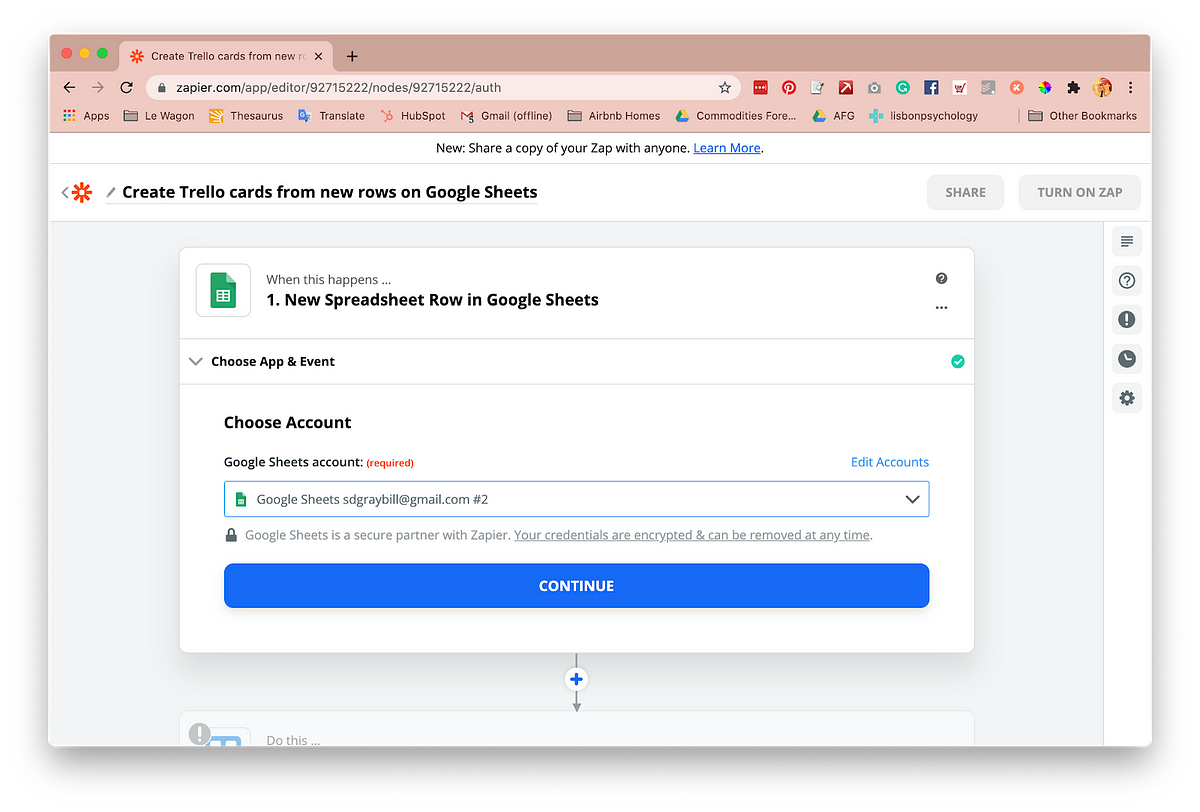
Step 6)
Click “Continue”.
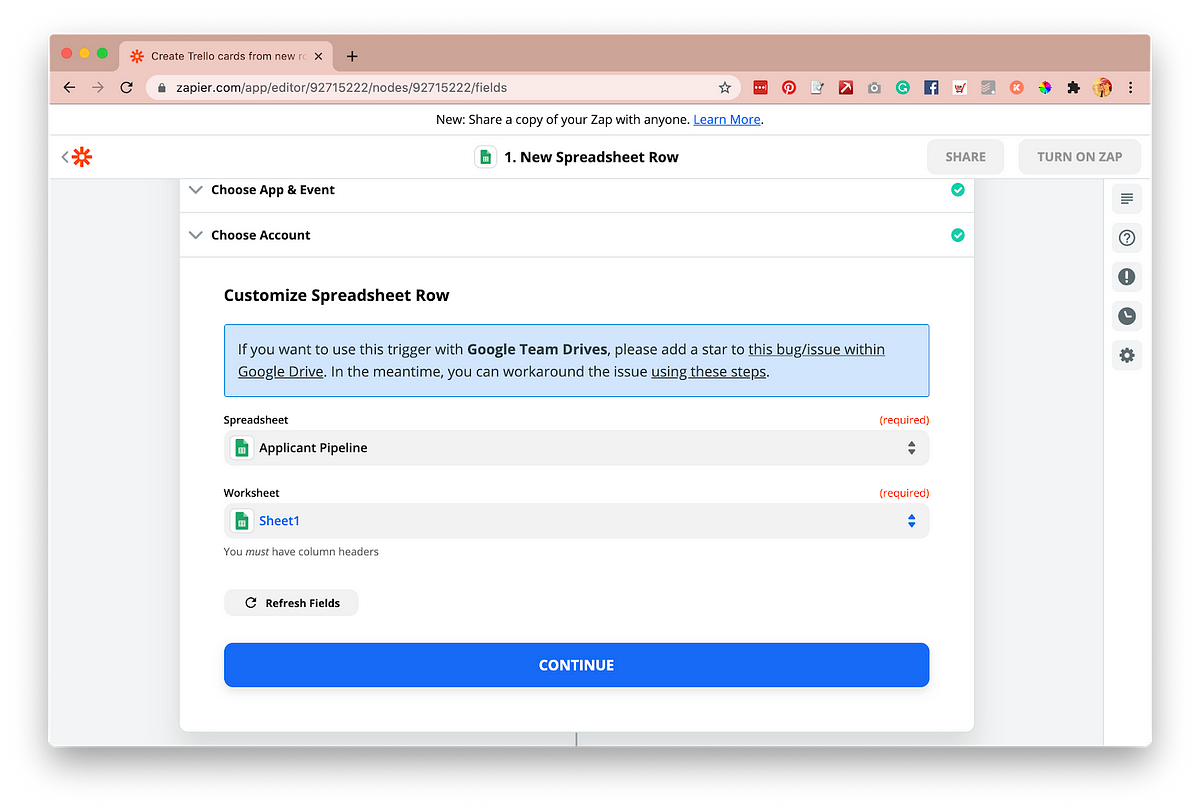
Step 7)
Click “Continue”.
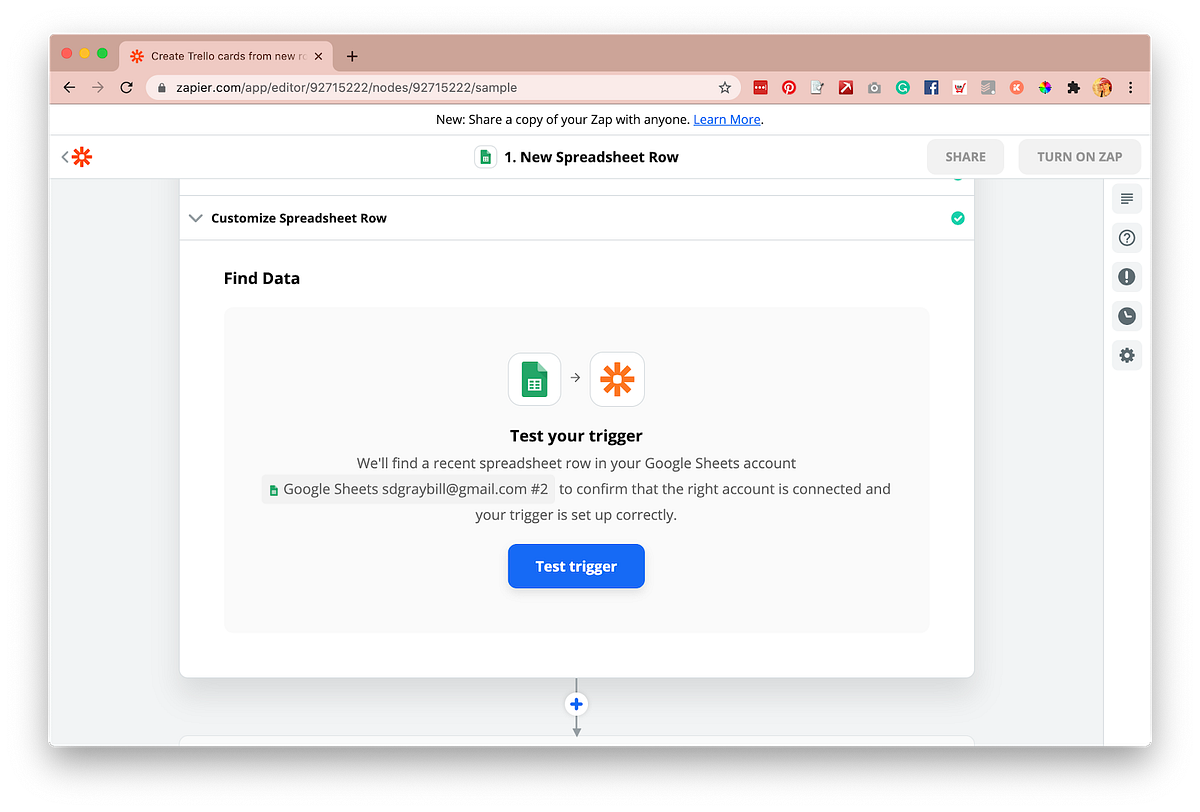
Step 8)
Click “Test Trigger”.
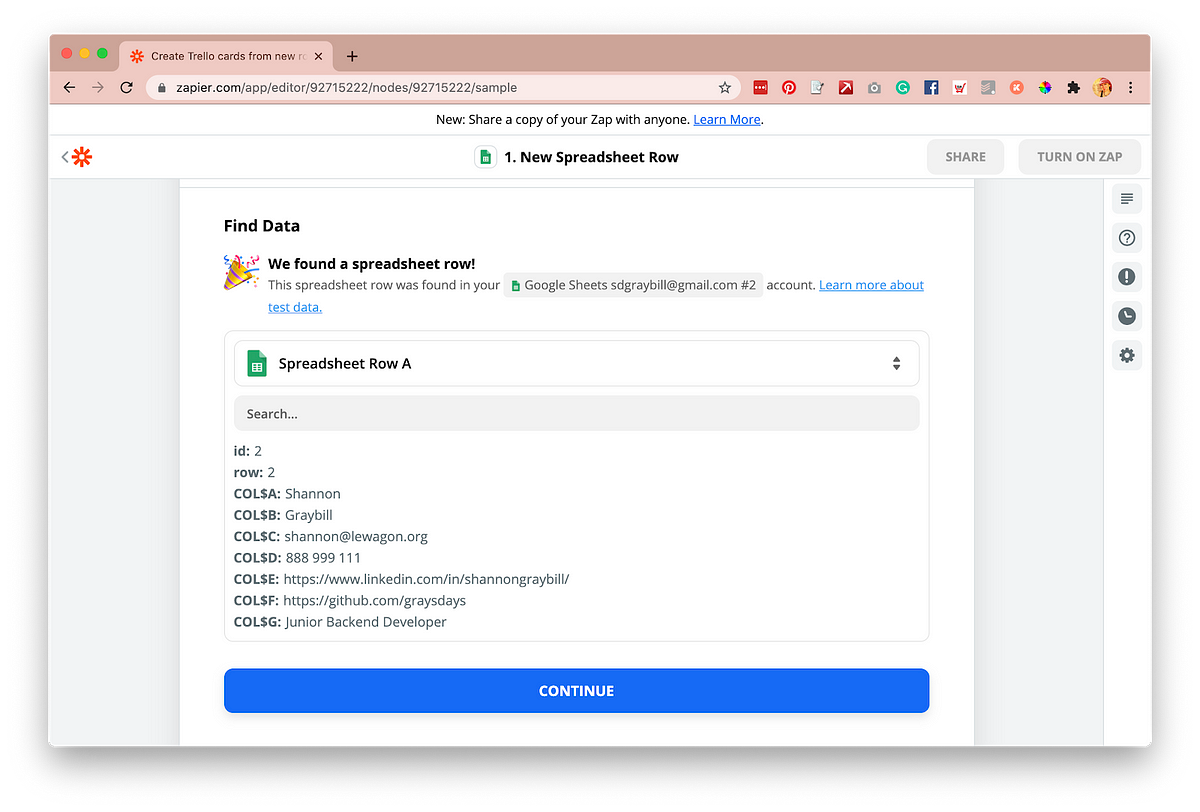
Step 9)
Click “Continue”. Zapier will automatically detect the first dummy row (Row A) on your spreadsheet.
Step 10)
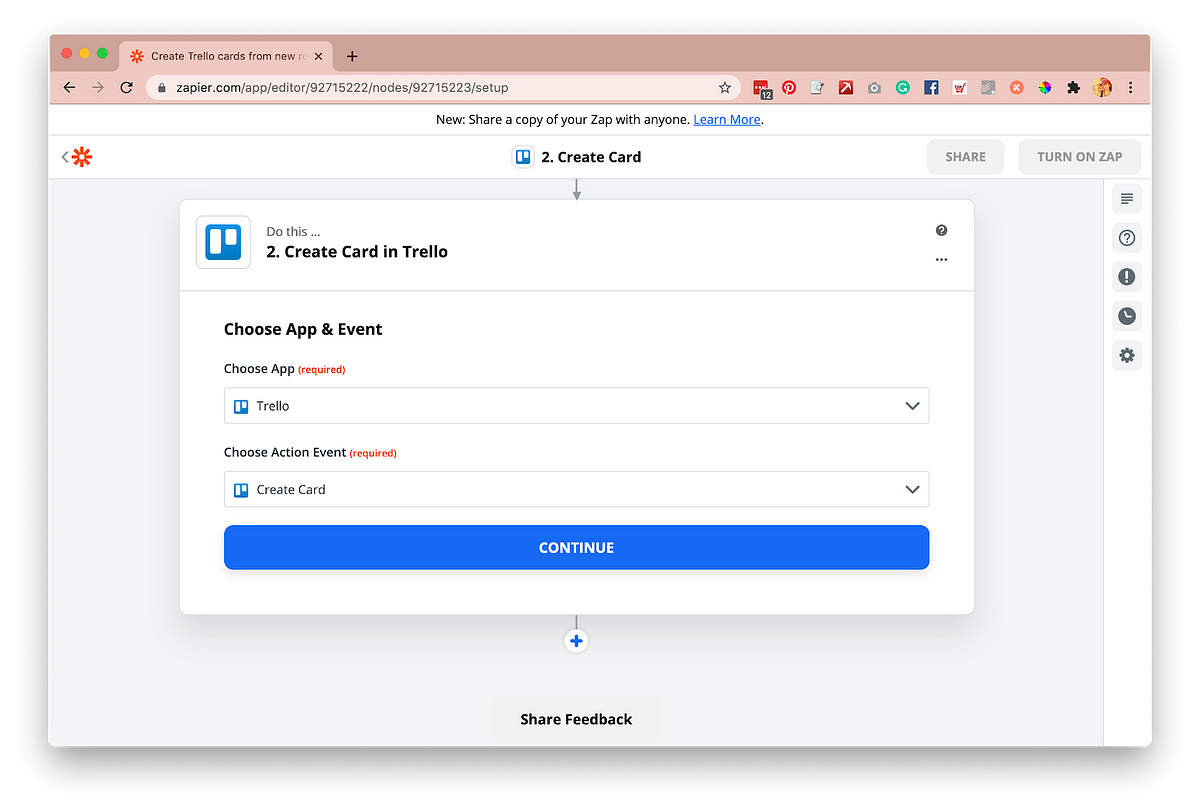
Select “Trello” and “Create card” and click “Continue”.
Step 11)
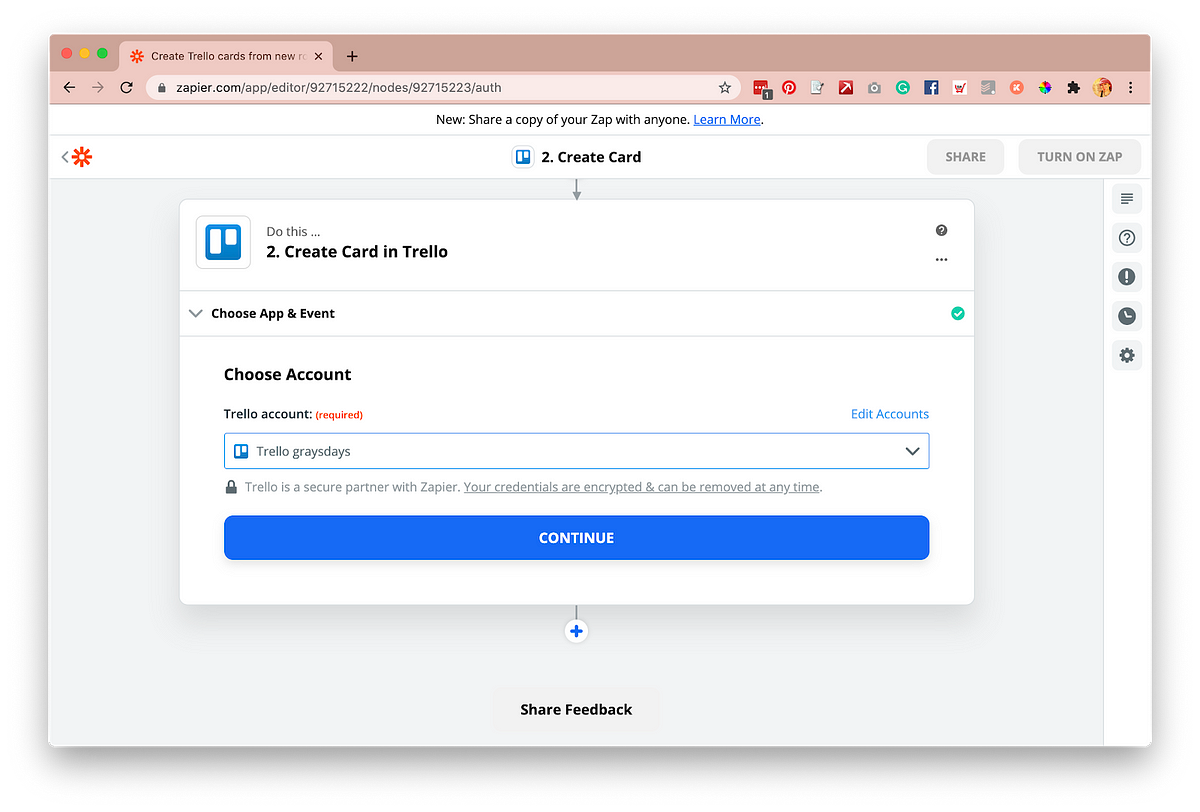
Link your Trello account and click “Continue”.
Step 12)
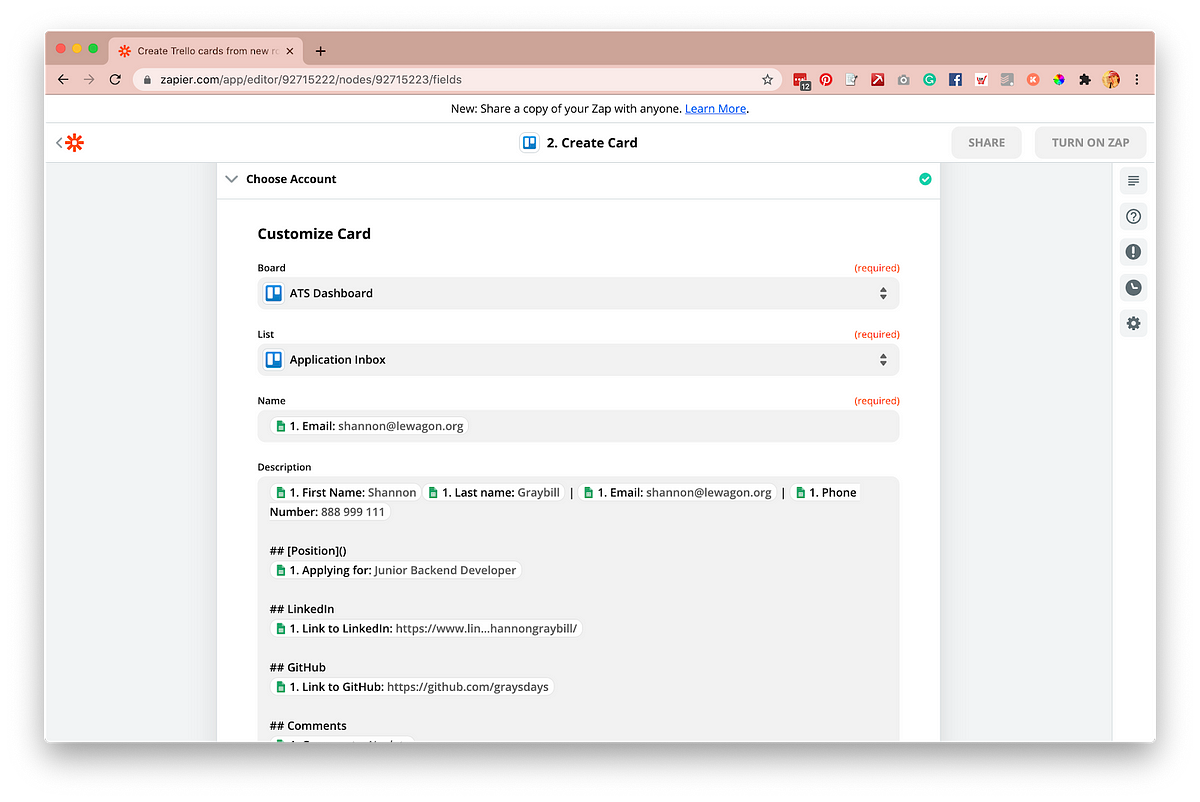
Select the “Board” that you created earlier in the process (ATS Dashboard), and the list (Application Inbox) you want your new leads to populate in.
Step 13)
Click inside the Name field to select the card title. This will give you a drop-down field of all of your Google Sheet columns that you linked to previously. This Name field will name the Trello card and is often used as a trigger for other “zap” connections. And for that reason, we chose to use the “Email” column for the Name field rather than “First Name” plus “Last Name” as we can be sure the email is unique — in other words, in case you have two applicants named “Ana Santos” it’s best to identify them by their emails rather than First and Last names.
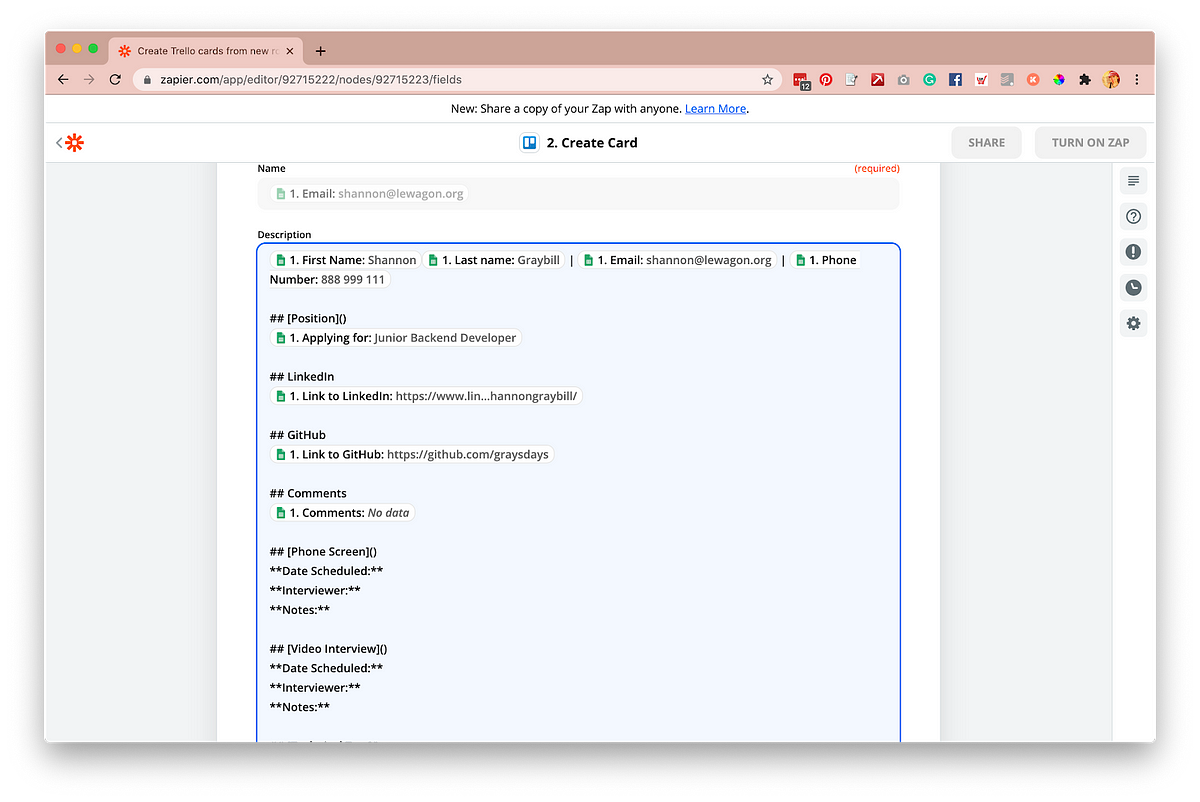
In the Description field, I’ll add any other relevant information from the columns on the google sheet I created for lead entry. Again, click inside the field and it will display your columns from the google sheet. I suggest adding the applicant’s contact information and then create templates for each stage of the interview process.
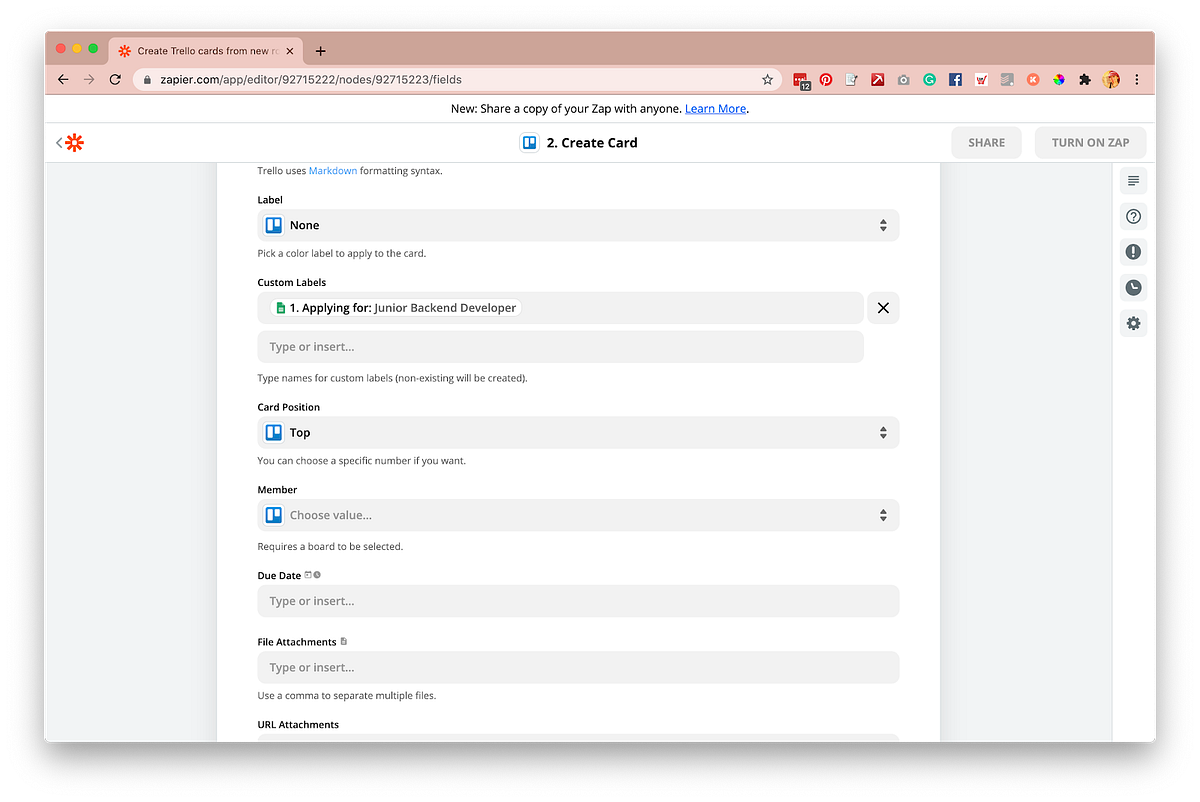
Step 16) Optional
You can also add custom labels based on entries into your google sheet, as well as assign specific leads to certain team members, add due dates, as well as file and URL attachments. For the sake of this demonstration, I’m going to keep it simple.
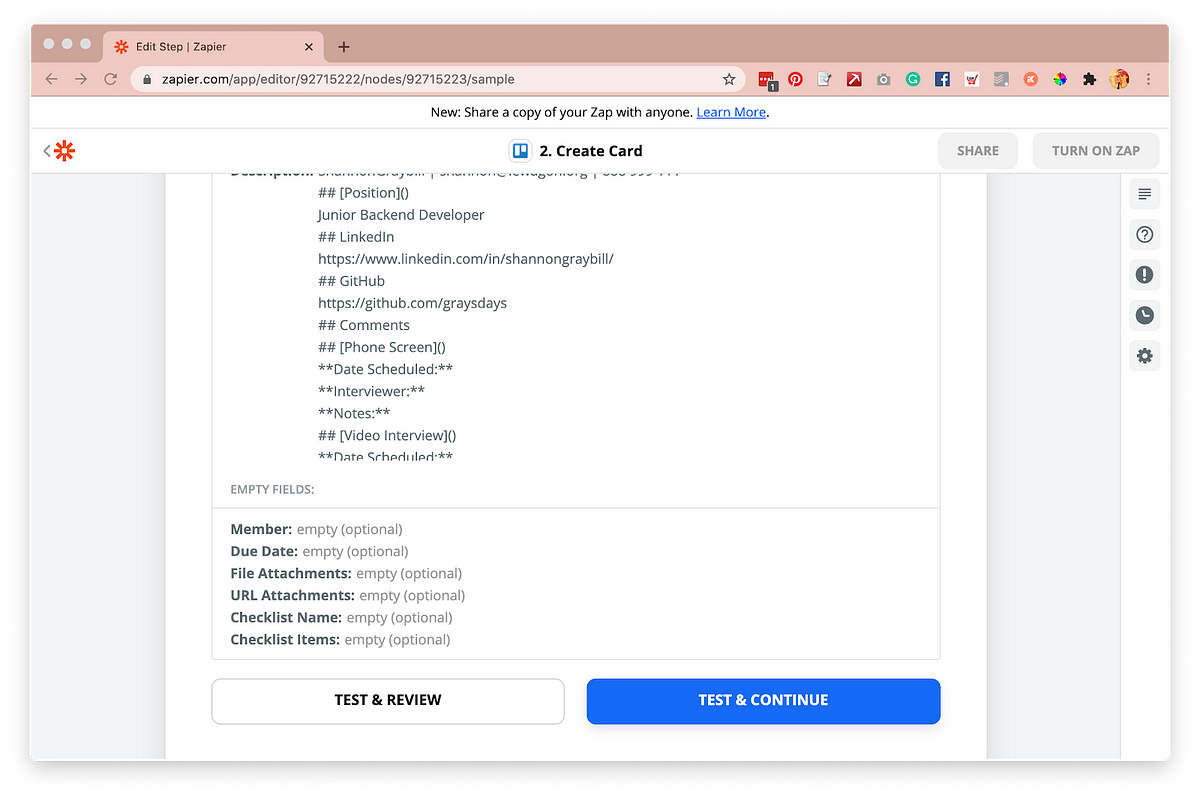
Step 14)
Once you’ve established your fields, it’s time to send a test card to Trello. Click “Send Test To Trello”
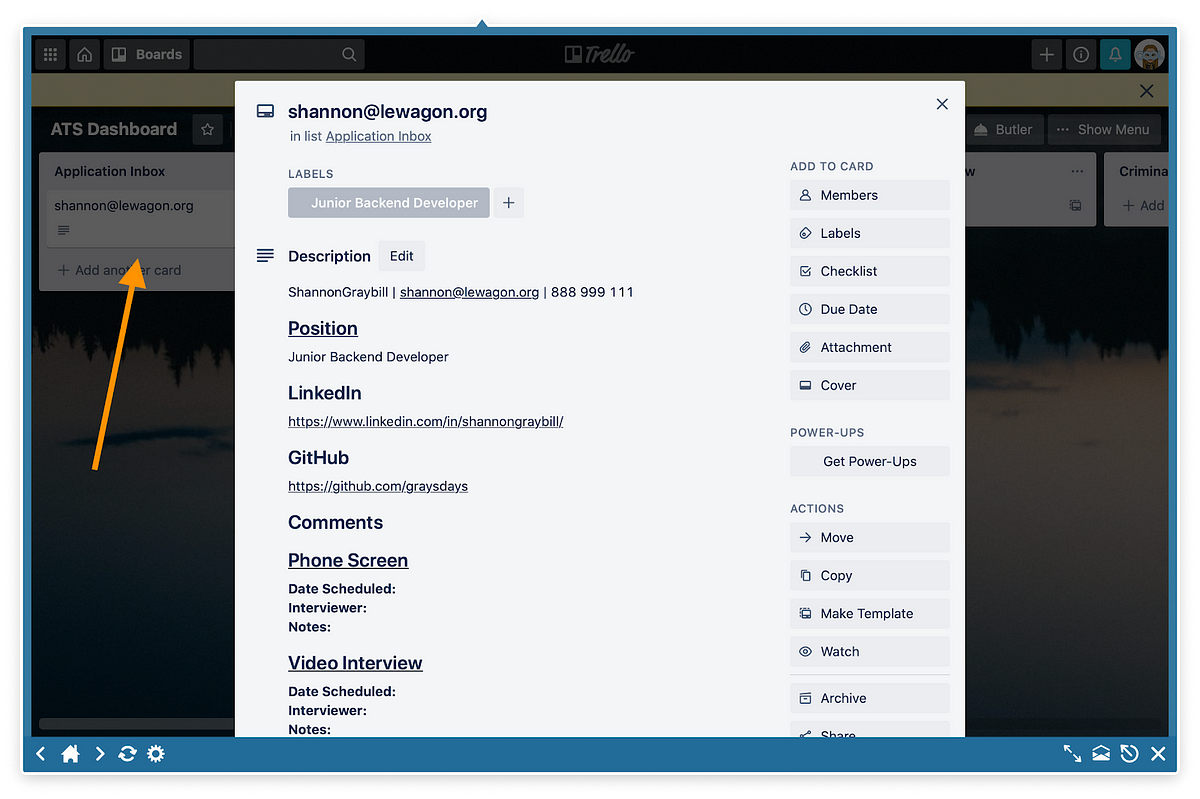
And there it is…Check your Trello board. Zapier just automatically created a Trello card 🎉
Now that you’ve set up the Zap, you can now begin to enter data into your Google Sheet and have it populate Trello cards.
To Note: Zapier only updates every 5–15 minutes based on the plan you’re on so leads entered on the google sheet won’t always instantly appear.
Step 15)
Once you’ve set up this Zap, enter all new applicants into your google sheet, and use Trello to move leads through the recruitment process.
From there, you can start setting up other Zaps to automate more of your ATS pipeline and workflow. Trello’s blog post on “The Ultimate Trello for CRM Workflow Breakdown” is a great resource to get inspired on other possible integrations to pimp your Dashboard.
Are you looking to change careers? Are you or your teams partially unemployed?
What if now was the right time to build your skills with Le Wagon and start the digital transformation of your business? 💪
Le Wagon is launching 3-day training courses 100% funded for employees on partial layoff 💰
🎨 UX / UI Design
Accelerate your projects through prototyping and establish your graphic charter
💻 Web Development
Understand what is behind a website and publish your company website
📊 Data Analysis
How to collect, clean, analyze and visualize your business data
For more information, get in touch with shannon@lewagon.org
Shannon Graybill is the director of Le Wagon Portugal — focused on bringing tech training expertise to all companies.